Introduction
Users who are members of the “admin” group may carry out administration tasks from the Admin page accessed from the main navigation bar at the top of the Panther screen.
User Administration
There are two groups of users supported by Panther – “Admin” and “User”. Both can be used to login to the application, view the recorded data, and carry out most associated actions, but members of the “Admin” group may additionally:
- add more users
- download the syslog configuration and TLS certificates
- create API Keys
The user created during the app.panther.support signup process will automatically be an “Admin” user, who may then go on to carry out any further configuration and create any more user accounts that may be required.
Creating User Accounts
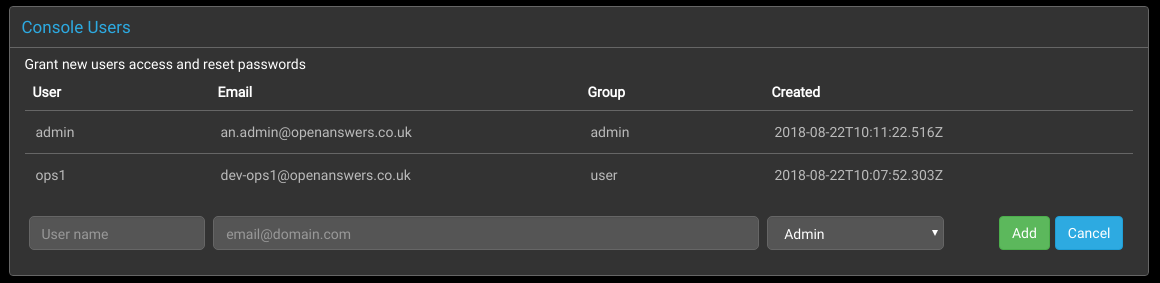
New users may be added by completing the user name and email address input fields in the Console Users section of the administration page. Once a group has been selected and the Add button clicked, a link will be sent to the new user via email for them to use to set their password.
Modifying User Accounts
A menu to edit user accounts can be displayed by clicking on an entry in the list of Console Users.

Deleting Users
To delete a user, click on the user in the users list to display the account control buttons, and then click the Delete button.

Changing Email Addresses
To change a user’s email address, click on the user in the users list to display the account control buttons, type the new email address into the Email input field, and then click the Save button.

Resetting Passwords
To reset a user’s password, click on the user in the users list to display the account control buttons, and then click the Reset Password button to send a password reset link via email to the user’s configured address.

API Keys
Panther also offers an API to import event logs.
For security, registered users must supply unique keys when using this method to transfer data to Panther.
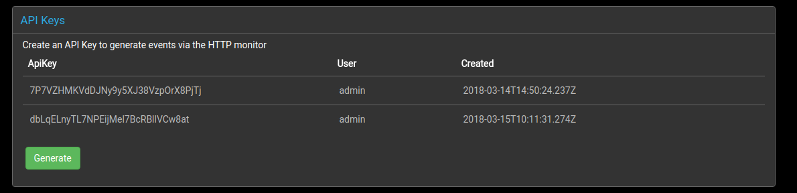
Keys are generated simply by navigating to the API Keys section and clicking the Generate button.
See the API documentation for more information.
Delete All Events
The Delete All Events section can be used to permanently remove every event from the database, returning the console to an empty state. To do this, click the Delete all button to display a confirmation prompt, then click Are you sure? to complete the operation.
This action cannot be undone.
Console Fields
The Console Fields section allows additional fields to be defined on top of the standard event fields. Once added, these fields appear as columns in the event console and can be populated by rules, allowing data specific to a particular deployment to be captured and displayed alongside the standard event information.
New fields can be added using the form at the bottom of the section. Existing fields can be edited or removed by clicking on them in the list.
This section is only visible when Panther is running in development mode.